Stereotaxic Microdrill (751887) User Manual
Please find the user manual for the Harvard Apparatus Stereotaxic Microdrill. A stereotaxic microdrill is used for small animal stereotaxic surgery. Often for the implantation of microdialysis probes, ablation studies, implantation of electrodes, cannula implantations and any other time that a user may need to drill through the skull of a small animal. The handheld drill is simple to use and easy to learn.
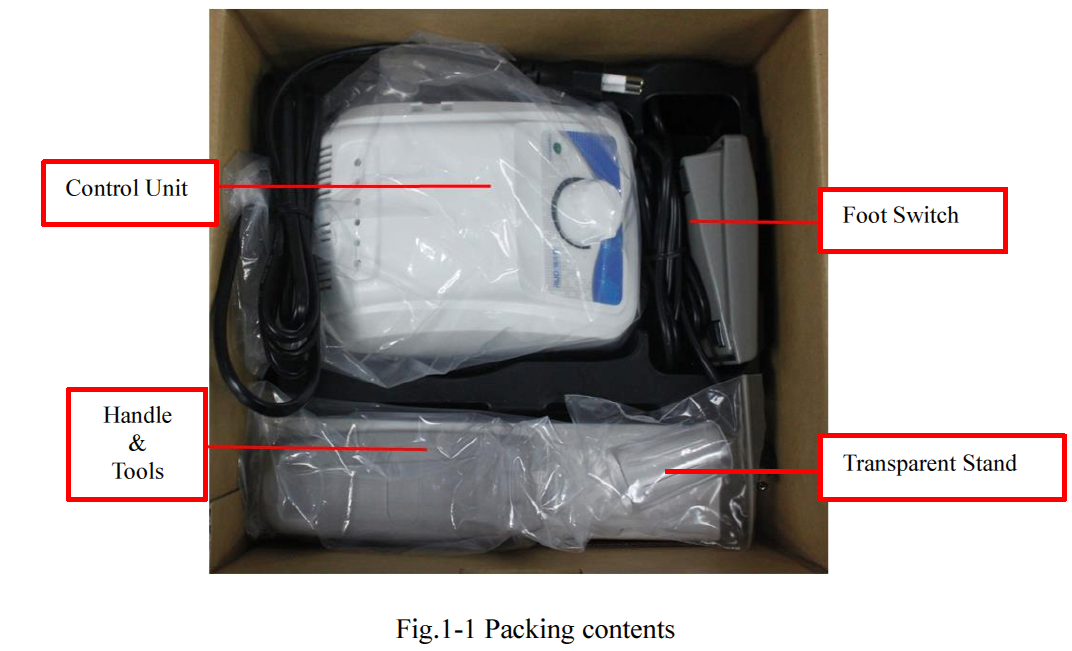
Unpacking
After unpacking please be sure to read through the user manual carefully before assembly and use. First ensure that the unit was shipped complete and unit is undamaged.
Features
- Max speed 35000rpm
- Power: 45W
- Clockwise and anti-clockwise (counter-clockwise) directions can be selected.
- Handle and footswitch control modes
- Secures onto most standard stereotaxic instruments with optional extra-large probe holder
- Drill bits: 0.5-2.3mm diameters
Assembly
Components Connection
Before connecting components, ensure that the unit is not plugged into a wall socket. Carefully check the unit and ports before connecting any accessories. Once the unit has been inspected connect the handle and footswitch into the handle port and footswitch port separately.
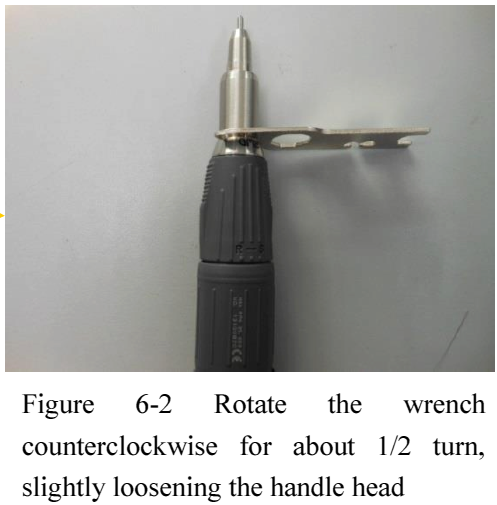
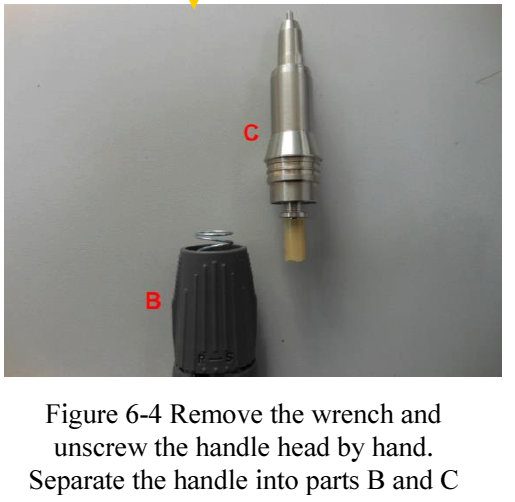
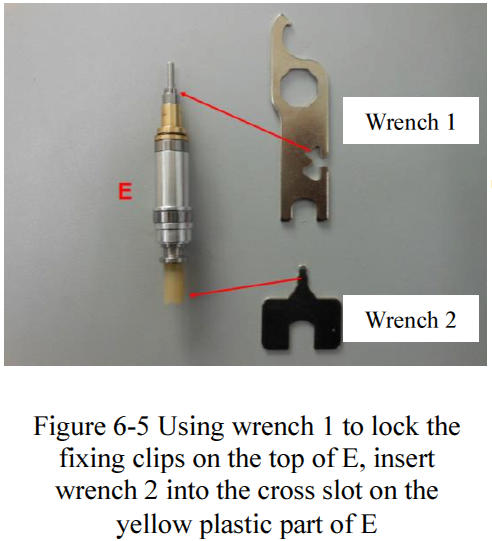
Changing the drill bits
First ensure that the power cord is disconnected and then change the old bit with a new one according to the procedures shown below.

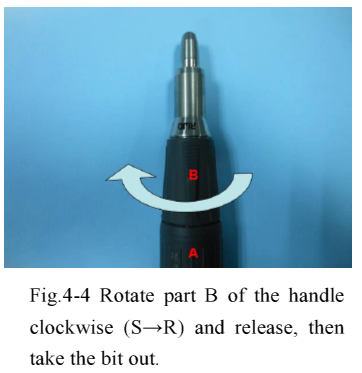
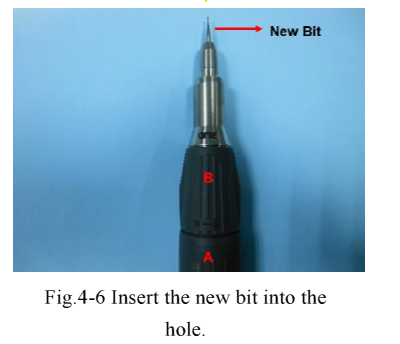
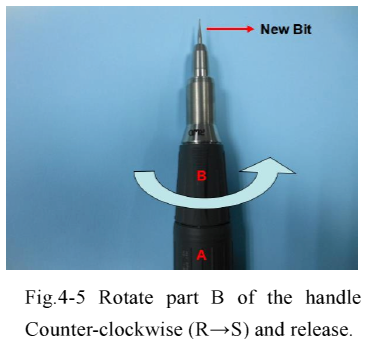
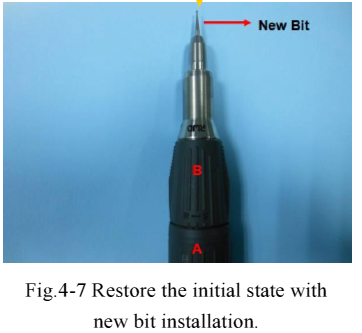
NOTE: do not power on the handle without dummy or drill bit inserted. You may cause motor failure otherwise.
Using the Microdrill
Preparation before use
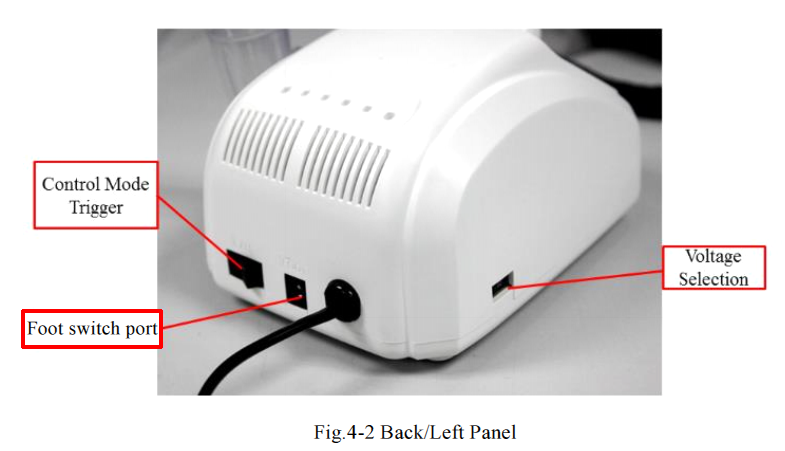
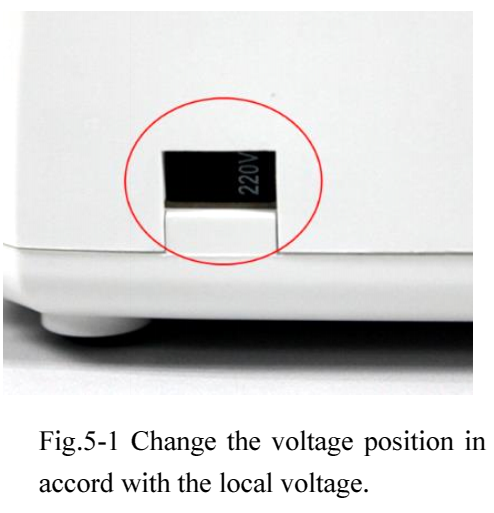
Before the unit is plugged in ensure that the voltage specification is set correctly for your local voltage (110V or 220V). This can be checked on the rear panel of the unit.
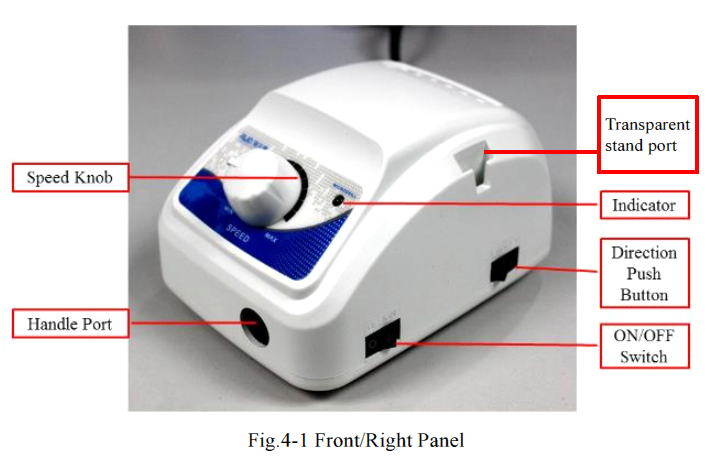
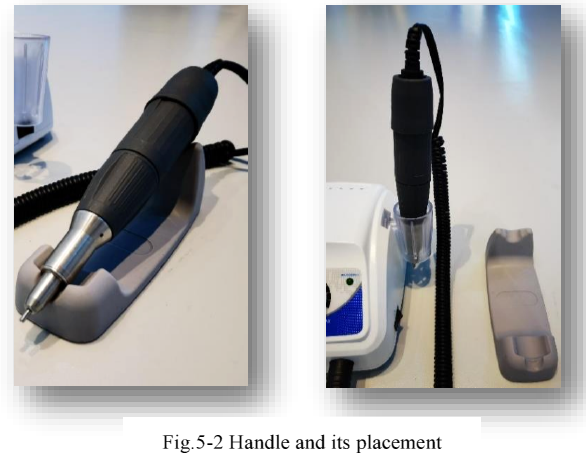
Second, make sure that the ON/OFF switch is in the OFF position and the drill handle is placed onto the stand as shown below.
Drill Control
There are two modes on the microdrill. There is "Hand Control" and "Foot Switch Control", which are user selectable.
When the "Hand Control" option is chosen turn the "Control Mode Button" to the "H" position and then turn the unit on by changing the ON/OFF switch to "ON." The drill will rotate and the direction and speed can be adjusted at any time during use.
When the "Foot Switch Control" option is chosen place the "Control Mode Button" to the opposite position from "H" and turn the unit on by changing the ON/OFF switch to "ON." The drill will then rotate when the footswitch is depressed.
In both cases the speed can be adjusted with the Speed Knob.
Ending Use
After you are finished using the drill, place the drill handle into the transparent stand supplied with the unit. After your experiment make sure the unit has been powered off, and then wipe the drill with dry paper towels or soft cloth. Placing the drill handle into the transparent holder will prevent the handpiece from rusting.
NOTE:
- Do not disassemble the mechanical part of the drill bit with a wrench when not necessary, otherwise parts maybe lost or damaged.
- The higher the drill speed the greater the mechanical noise. This is normal.
- If the handle is placed on the stand with the bit upwards during use, or the bit is not cleaned or the handled is not placed into the transparent holder correctly the bit may rust.
Troubleshooting
If the instrument cannot work properly, please check the following:
Is the power cord in good condition?
Is the power cord plugged into the wall and unit firmly?
Are the handle and footswitch well connected with the control unit?
With the ON/OFF switch is turned to the "ON" or when you press the footswitch is depressed is the indicator light on?
Is the voltage setting correct for your country?
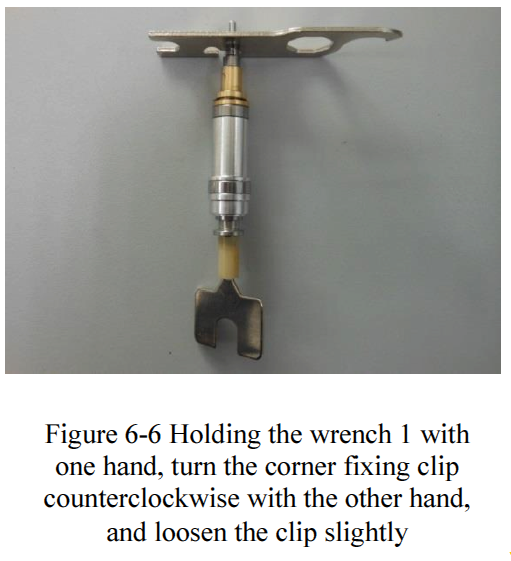
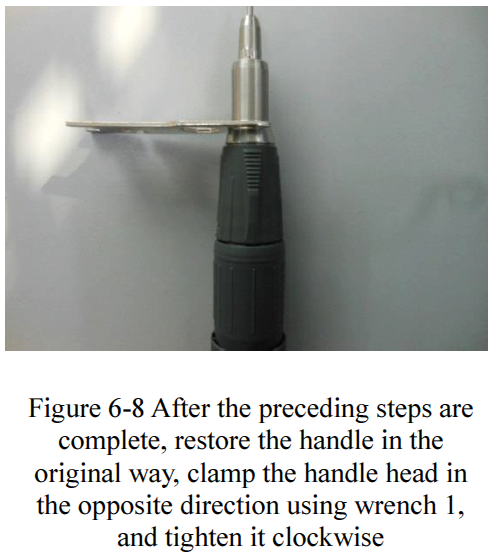
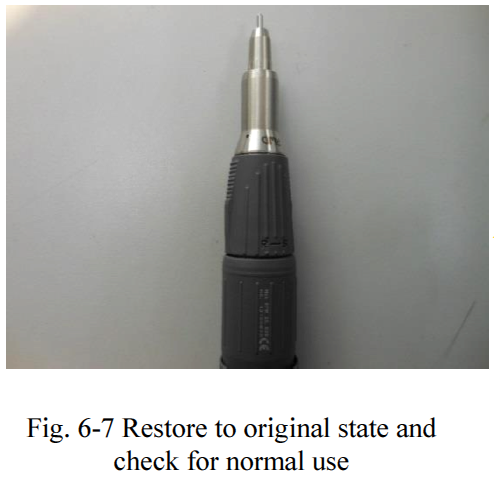
Drill bits are stuck guide


Warranty
The warranty period is 1 year from the date of invoice. User damage or regular wear and tear is not covered by the warranty.
Comments
0 comments
Please sign in to leave a comment.